Wellbytes’ CRM makes managing employee accounts effortless and efficient. With its bulk data import and instant verification feature, employers can quickly create multiple accounts while minimizing errors. Say goodbye to tedious manual processes and ensure a seamless onboarding experience for your team!
I. Add a Funding Classification
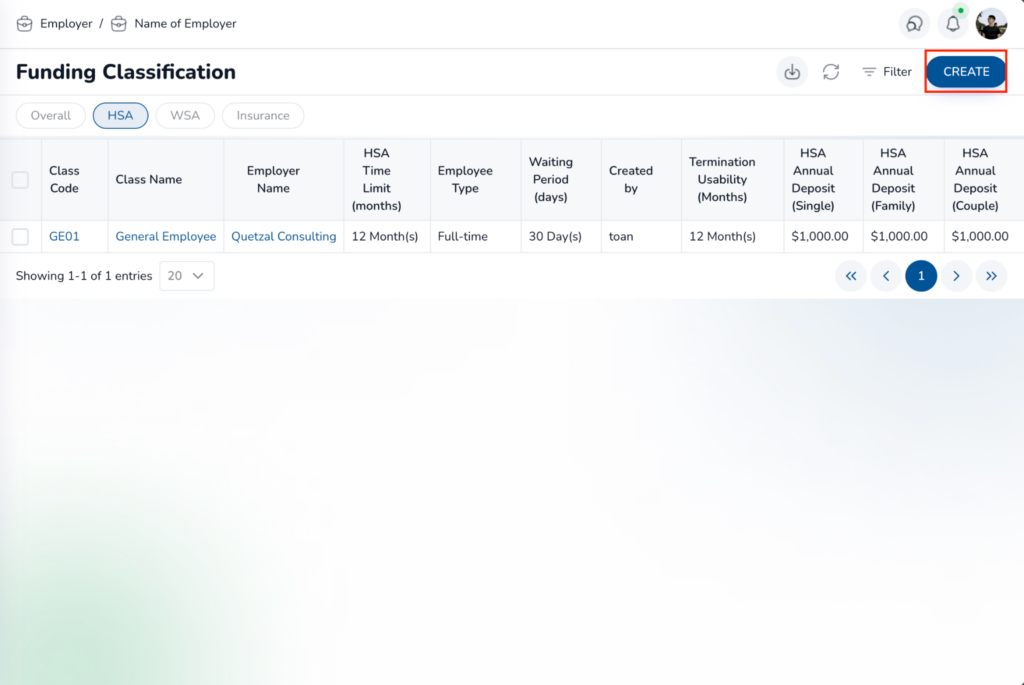
The Employer accesses the CRM and opens the Funding Classification Tab. The Employer should click the “Create” button
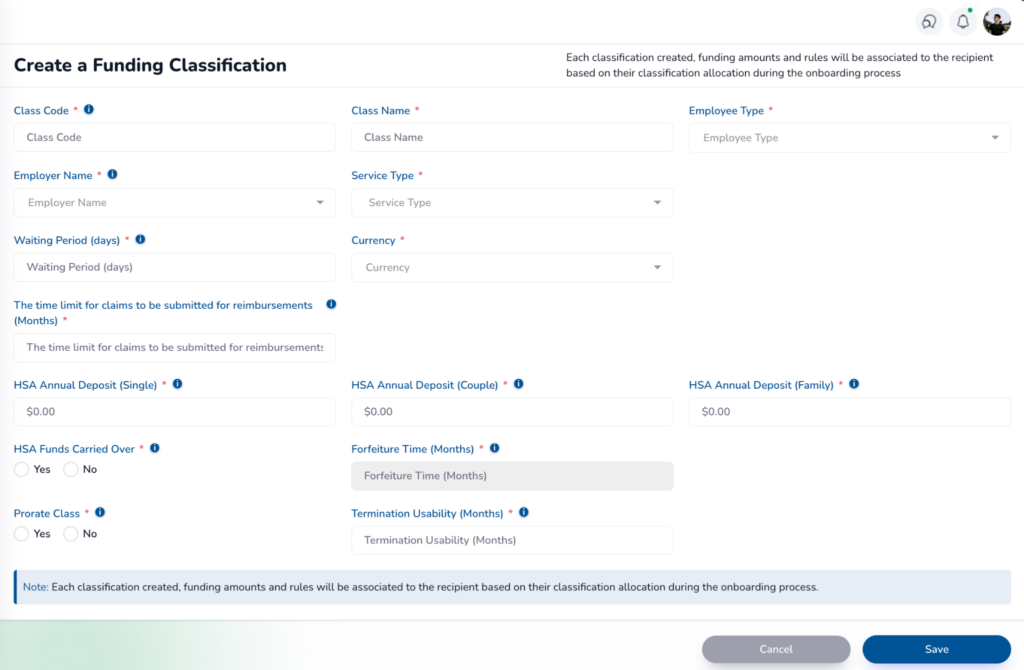
Then, the Employer have to fill in all the required information fields. The following are all explanations for the required information fields.
- Class code: The Code of the Funding Classification
- Class name: The Name of the Funding Classification
- Employer name: The name of Employer
- Employee Type: The type of Employee that is entitled to the funding class (Part-time, Full-time, Contract)
- Waiting Period: The time which the employee must wait before they can use the service
- Reimbursement Eligibility Timeline: The timeline in which the Claim Reimbursement is Eligible
- HSA Funds Carried Over: The option of whether the remaining amount of money from a period can be carried to the next period
- Prorate Class: The option whether to prorate the funding amount for the classification or not
- Currency: The Currency to which the Funding Amount is in
- HSA Annual Deposit (Single): The annual funding amount for a Single Plan
- HSA Annual Deposit (Couple): The annual funding amount for a Couple Plan
- HSA Annual Deposit (Family): The annual funding amount for a Family Plan
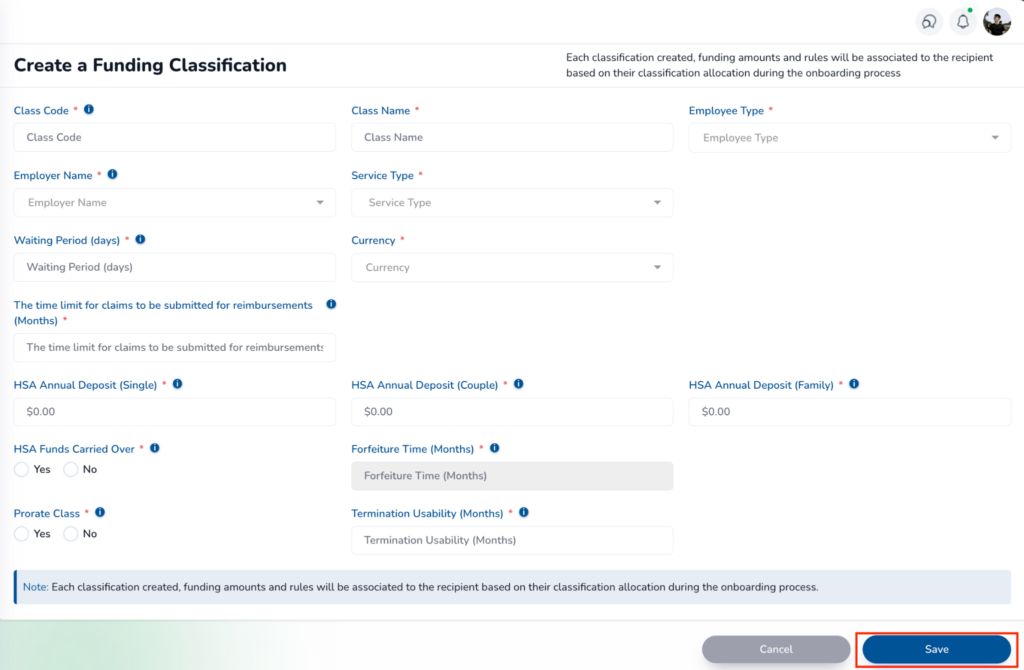
After having all the field filled, the Employer will click the “Save” button to create the new classification.
II. Add an Employee
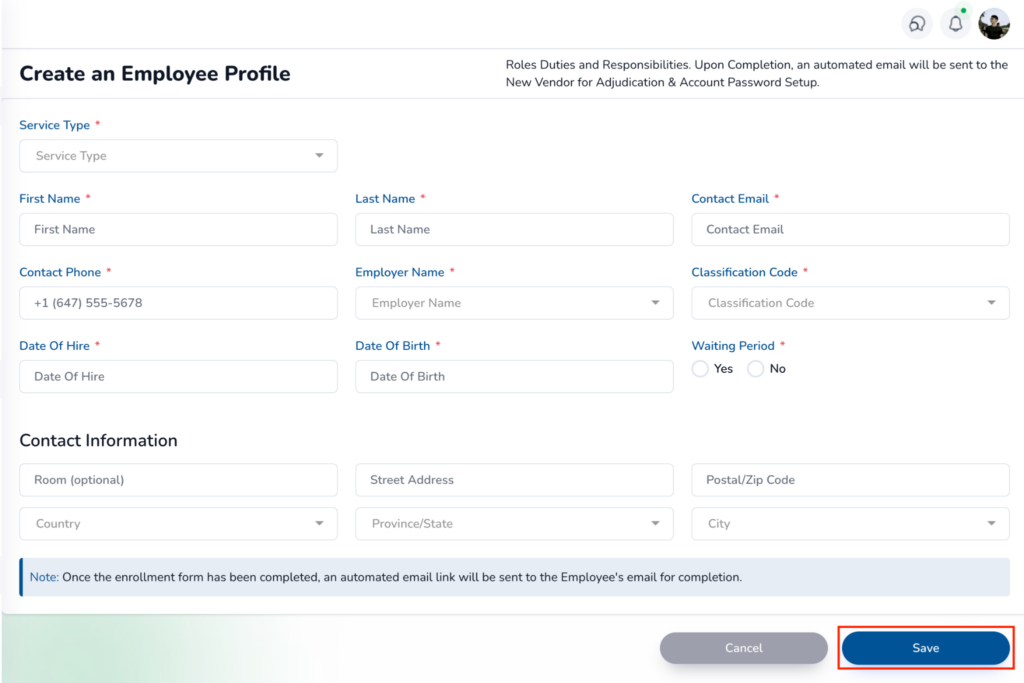
The Employer can click the “Create” button on the Employees Screen to create a new Employee

Then, they have to fill in all the required information fields, and click the “Save” button to create a new account.
III. Add Multiple Employee
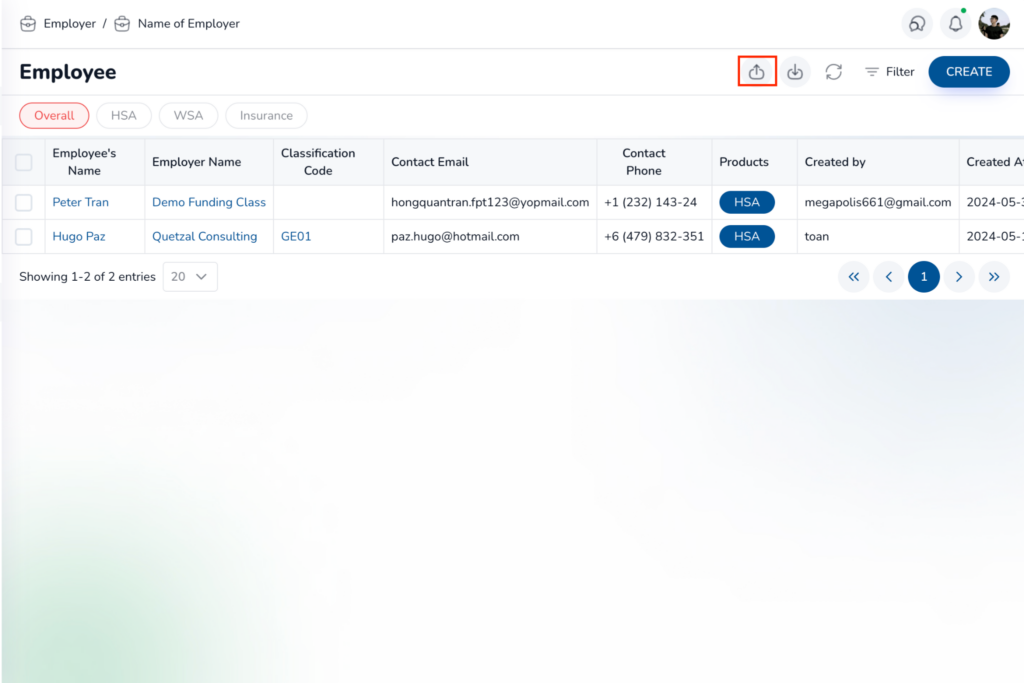
Employer can use the “Import Data” feature. To access this feature, the Employer should click on the arrow to the right of the “Create” button on the Employees Screen. The “Import Data” button will be displayed. Click on it to open the Multi Employee Enrollment Form.
Importing employee data is a multi-step process. The first step is to download the template by clicking the “here” text in the note section.
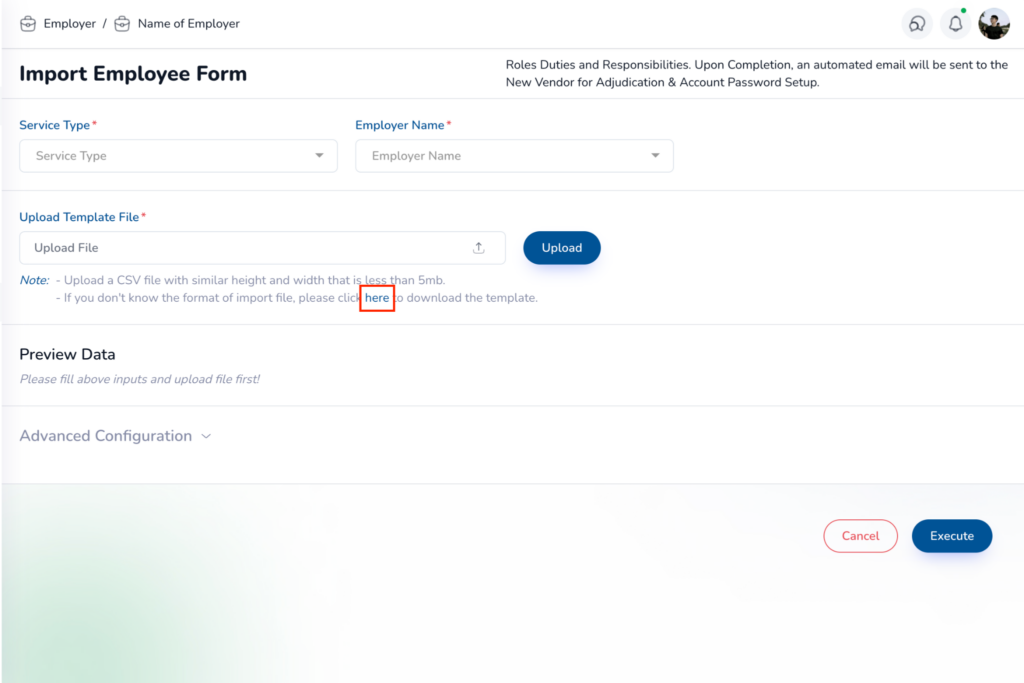
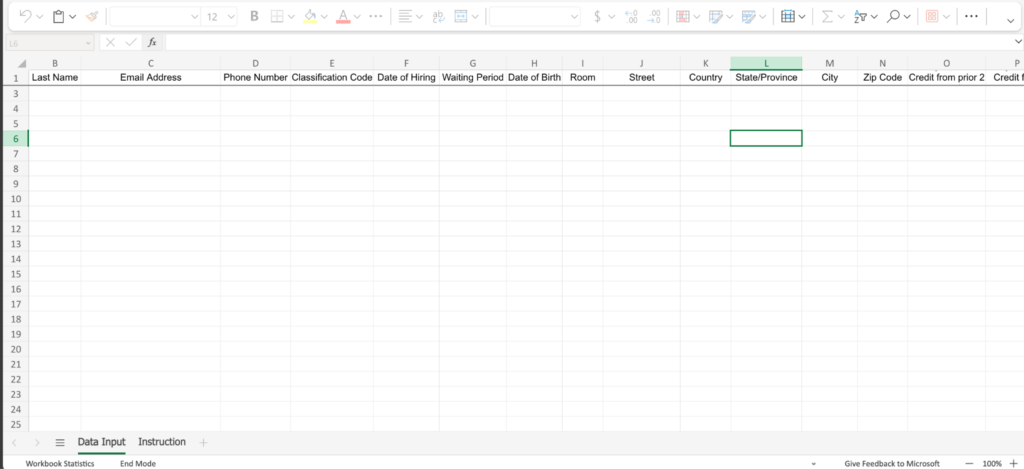
The Employer must then enter the required employee information into the template. This template is a form that collects information on employees who need to create an account on the system.
After entering the data into the template, the Employer should upload it to the CRM by clicking the “Upload Data Input” button in the Multi Employee Enrollment Form. Next, the Employer selects the Corporation for which the employees need to be imported, and clicks the “Execute” button
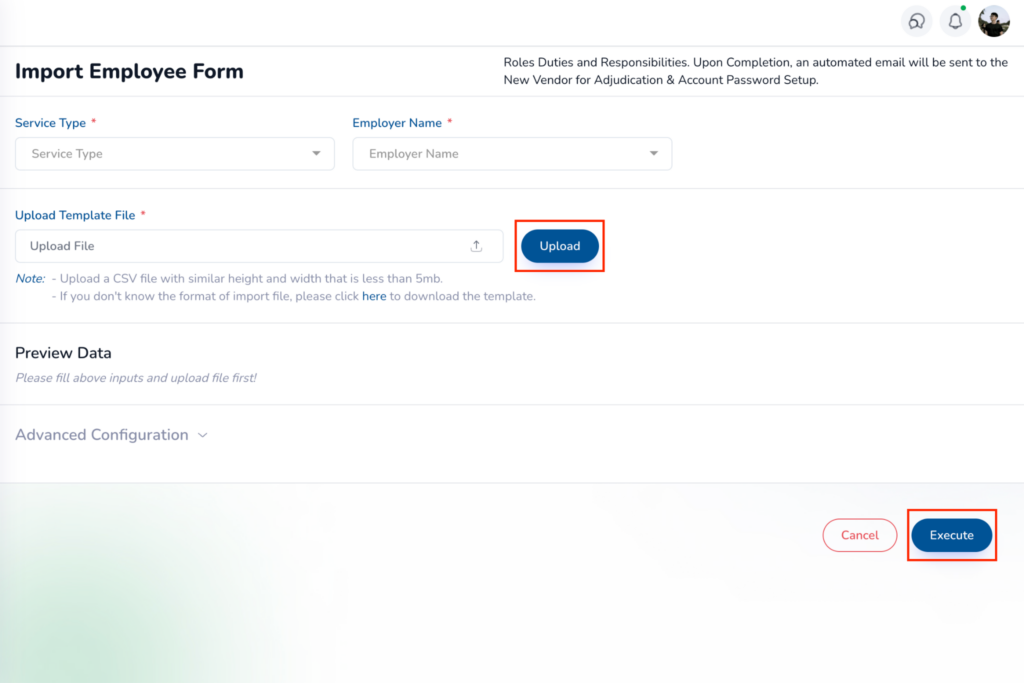
Once the data is uploaded, the system will scan and check the entered data immediately. It will then display the Creation Result, which contains two types of information: the number of successfully created records, and the number of failed creation records. The Employer can click on the “Download to See Details” button to view and correct any failed creation records.
By following these steps, the Employer can efficiently create multiple employee accounts simultaneously, reducing the time and effort required for individual account creation. The ability to import data in bulk streamlines the account creation process, ensuring a smoother onboarding experience for new employees.
Thank you for trusting Wellbytes HSA to support your health benefits journey. Our team is Wellbytes’ CRM makes managing employee accounts effortless and efficient.
With its bulk data import and instant verification feature, employers can quickly create multiple accounts while minimizing errors. Committed to making your experience as seamless and rewarding as possible, Wellbytes ensures a smooth onboarding process for your team!